 Arthur Salazar











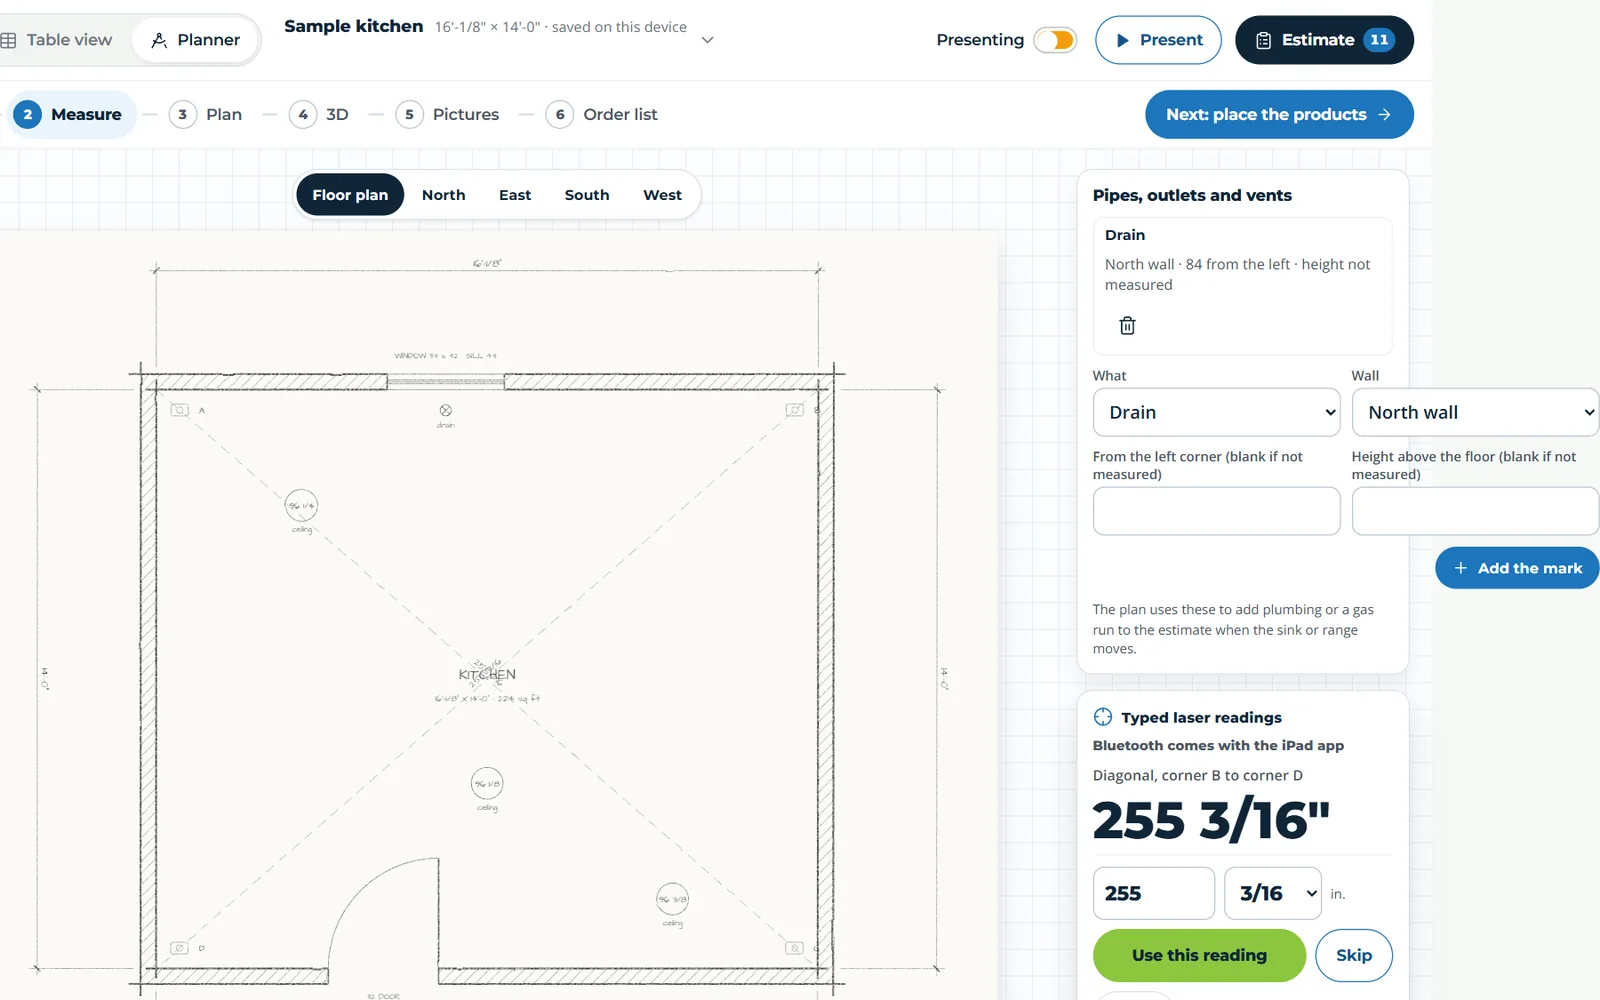
- Measure · step 1 of 7
Measure to the sixteenth
Wall lengths, both diagonals and the ceiling, typed from a laser. The room is laid out from its diagonals, and windows, doors and plumbing go exactly where they are.
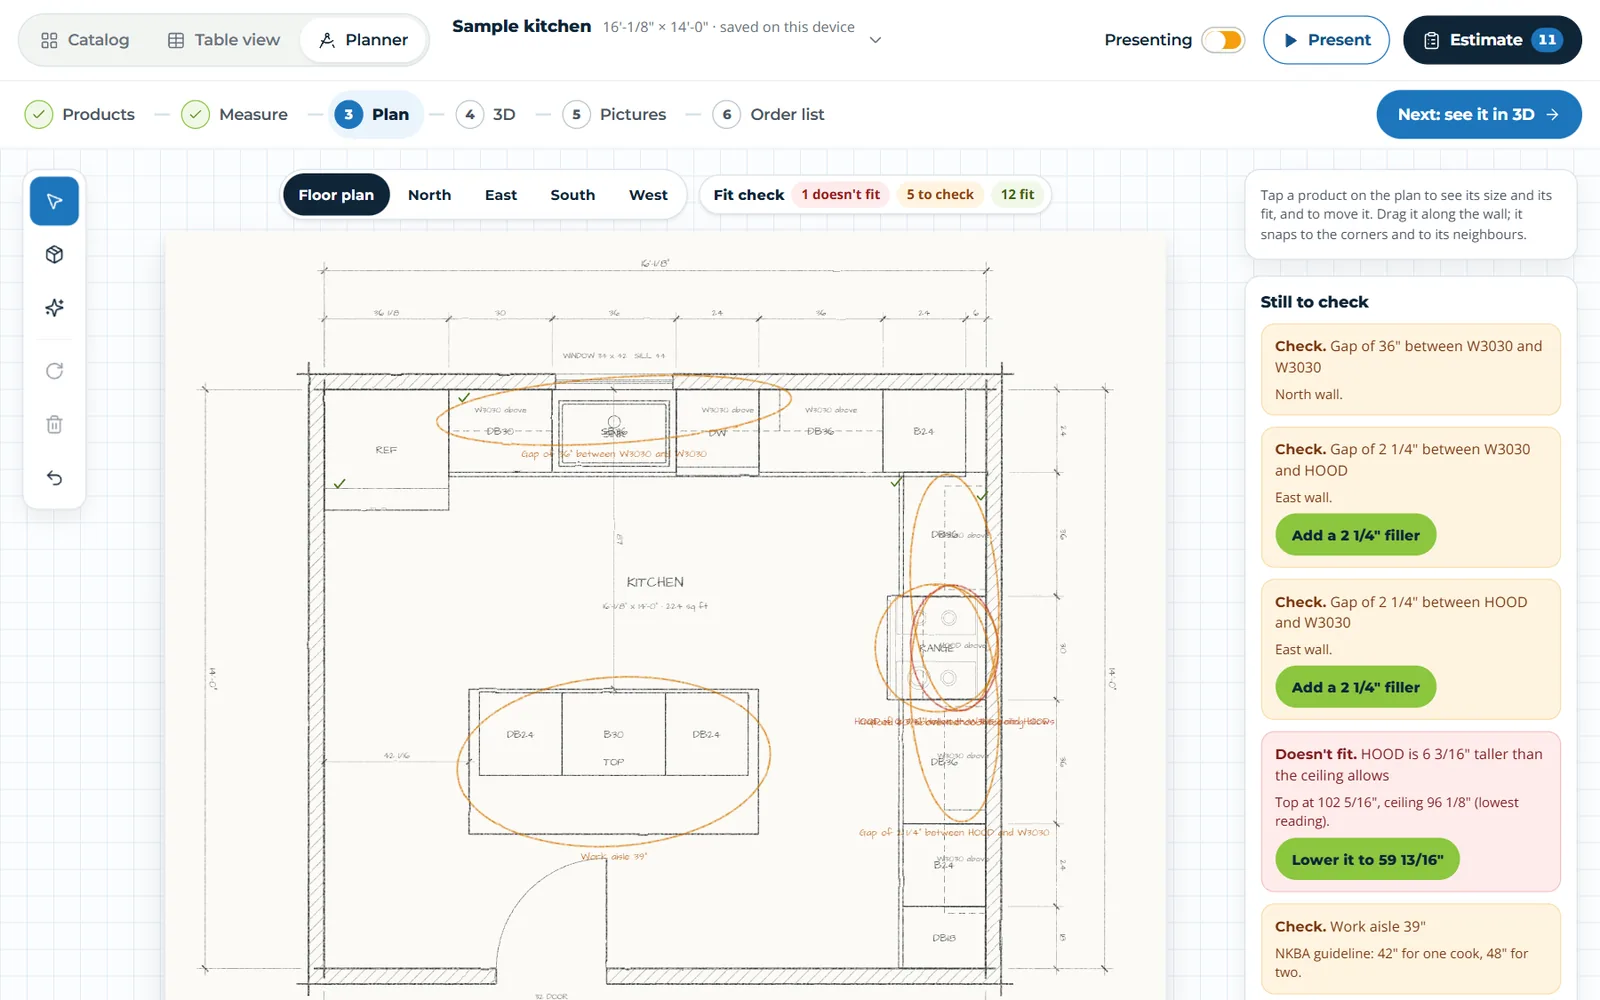
- Plan · step 2 of 7
A fit check that catches mistakes
Products snap to the walls. The check flags gaps, collisions, ceiling clearance and walkways against NKBA guidelines and offers the fix, like "Add a 2 1/4\" filler".
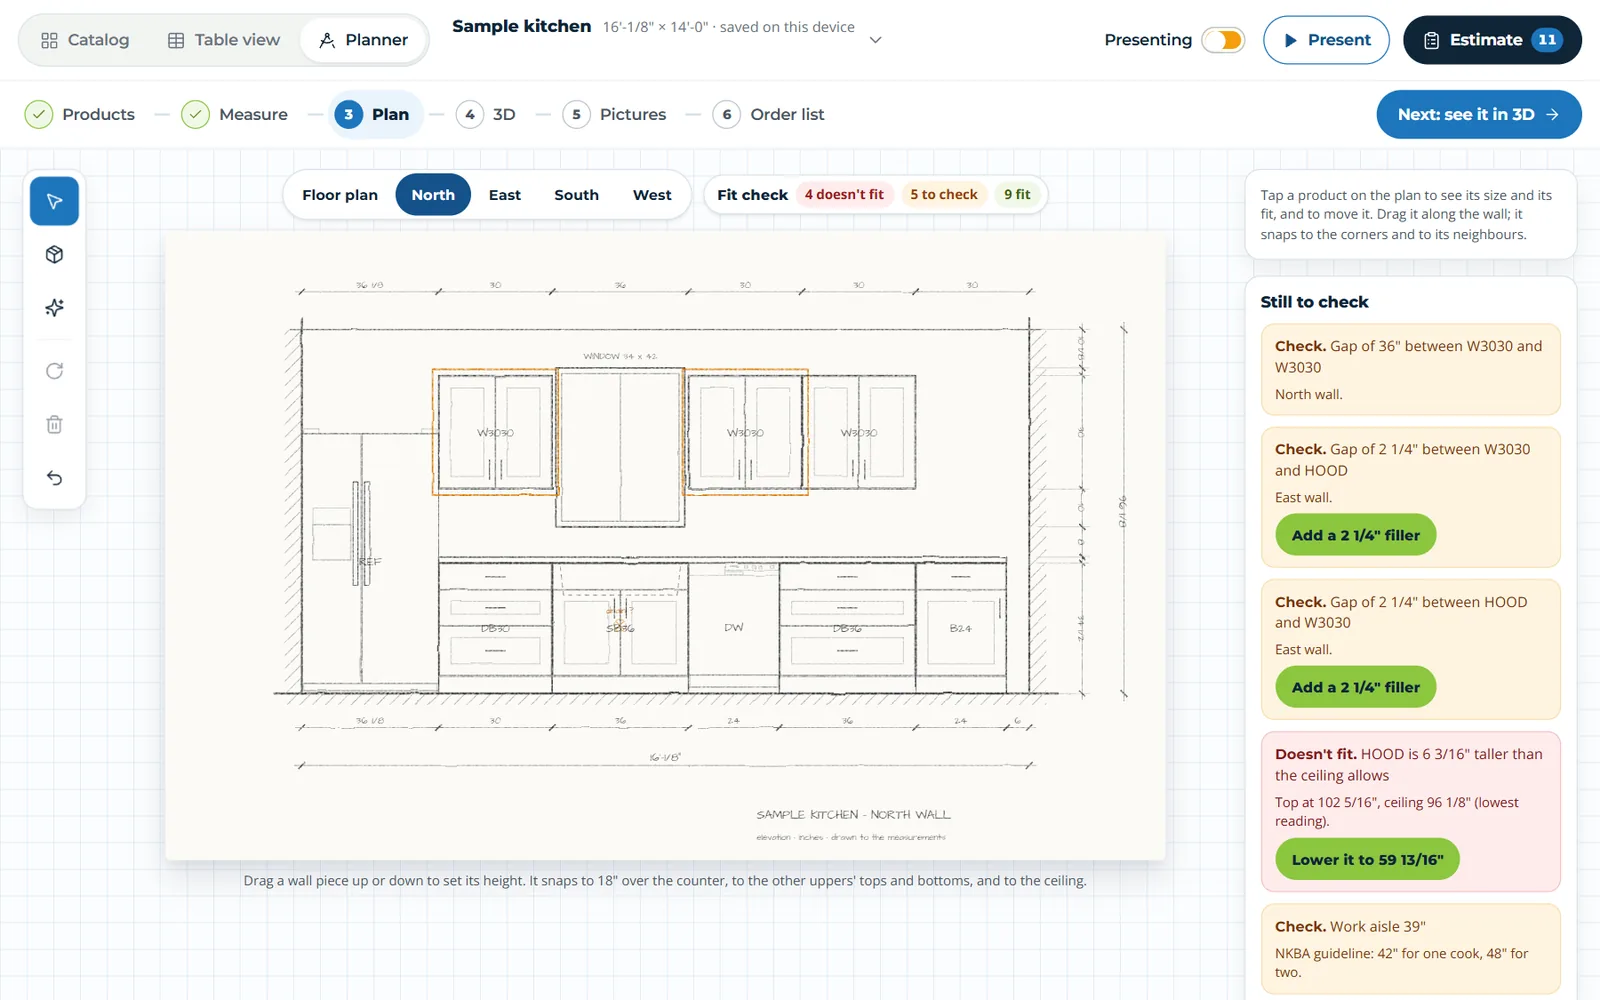
- Elevation · step 3 of 7
Every wall, straight on
Each wall drawn in inches, with every door and drawer front laid out the way the cabinet maker builds that box.
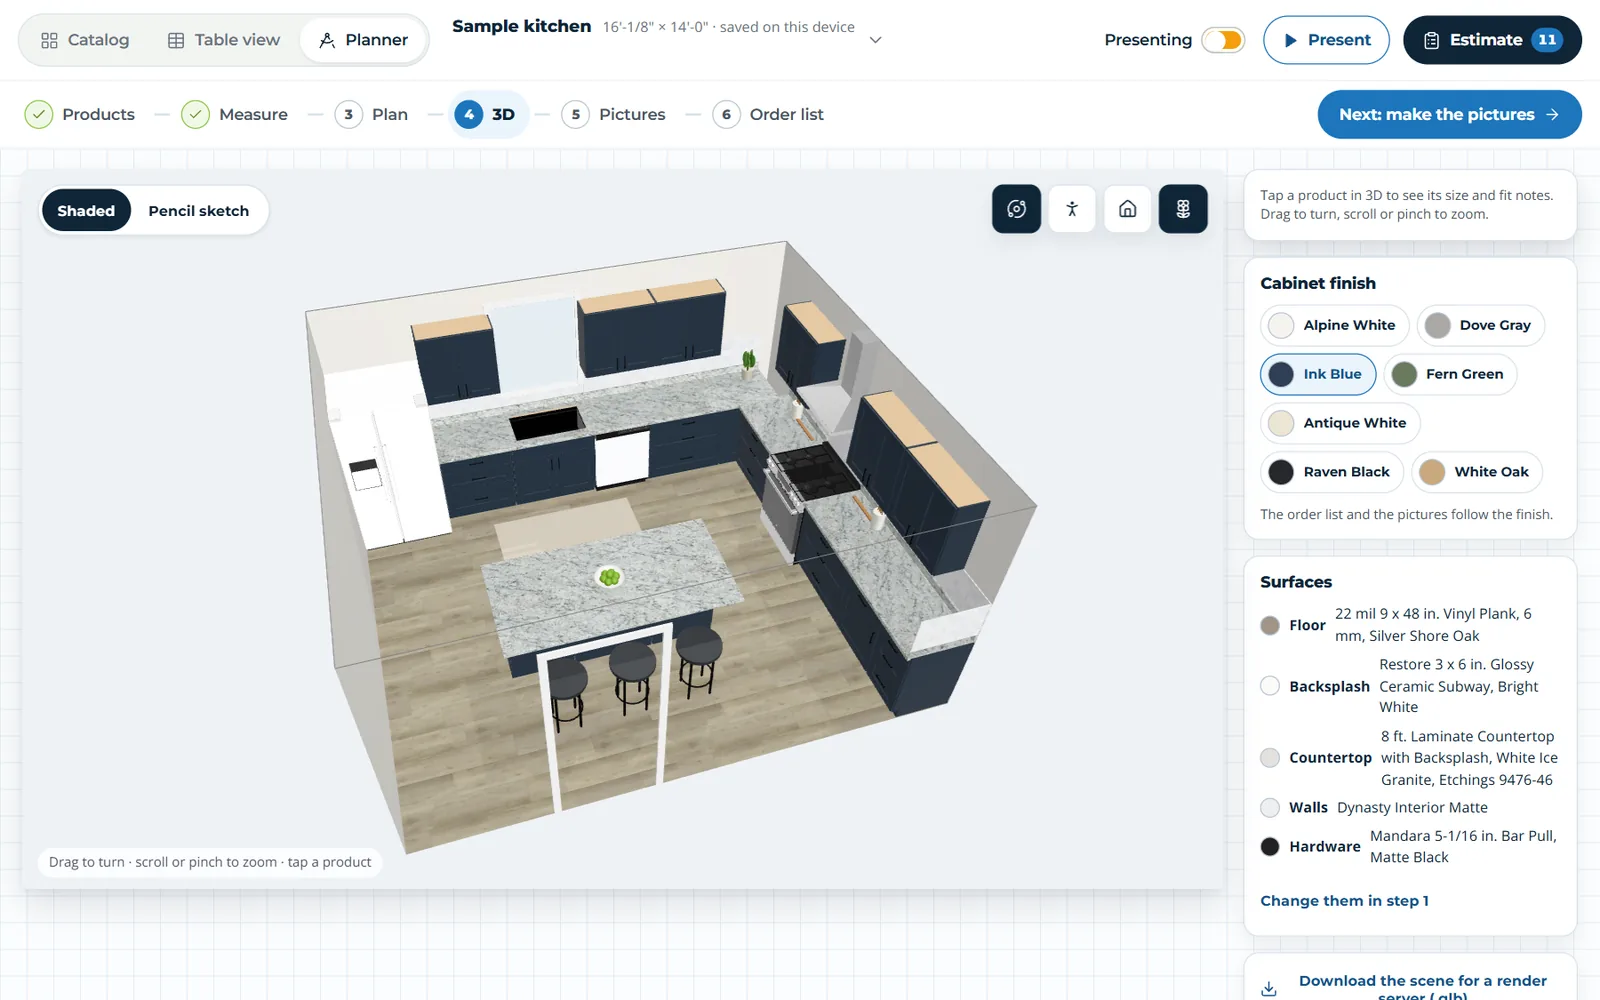
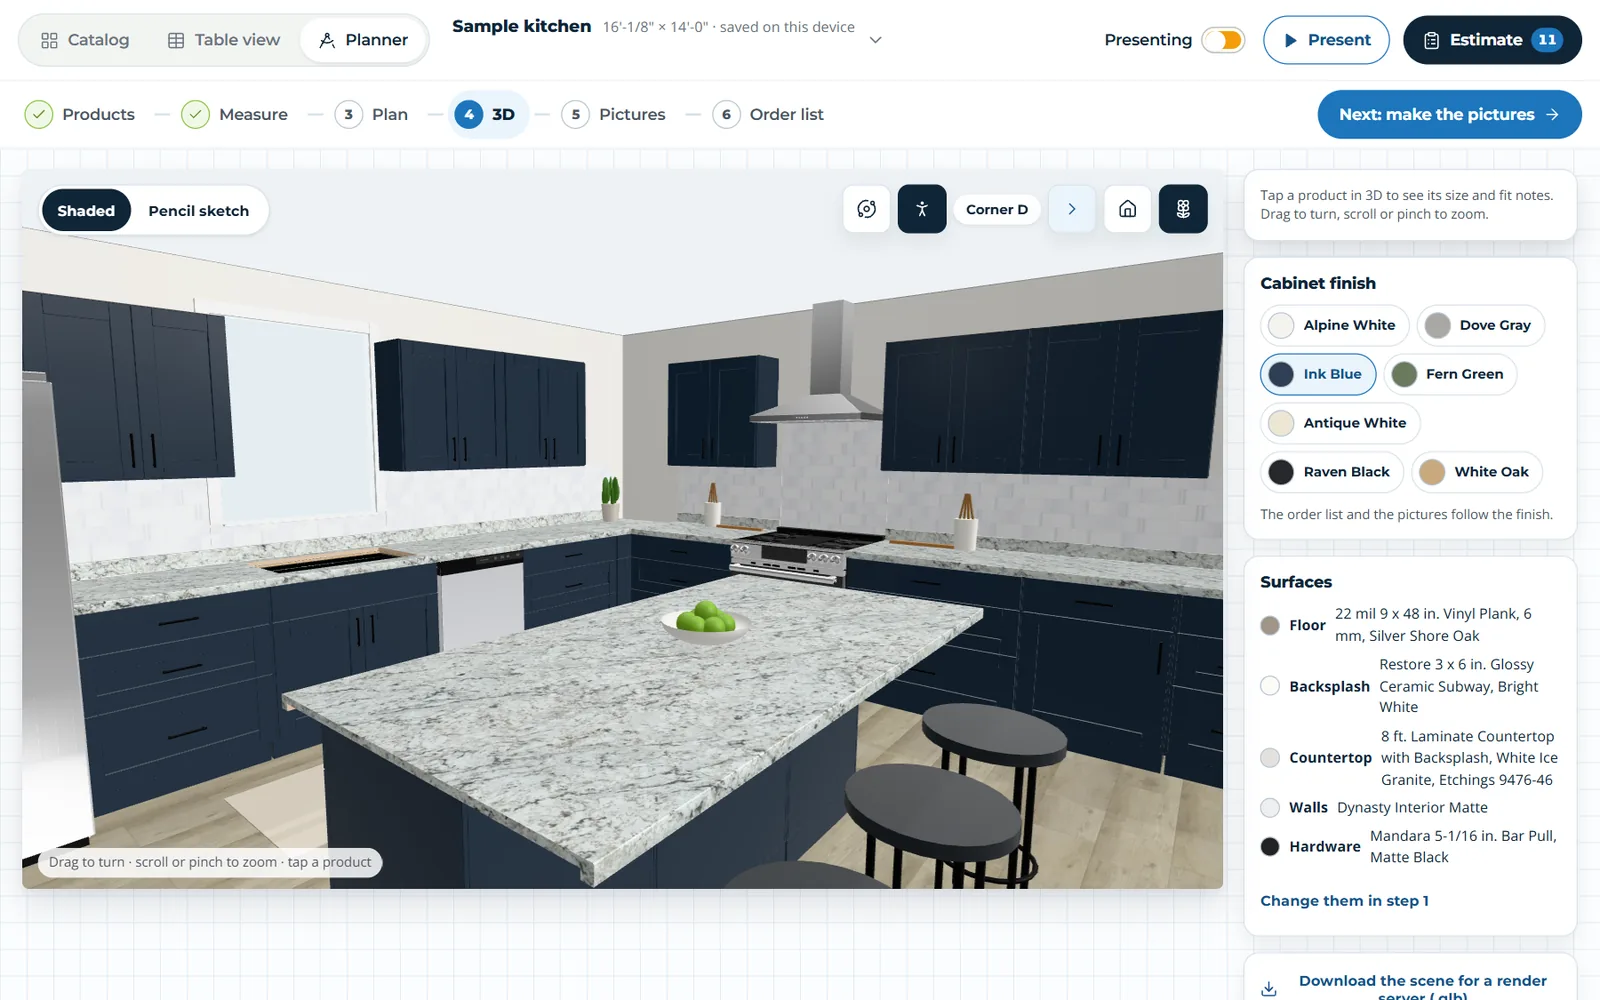
- 3D · step 4 of 7
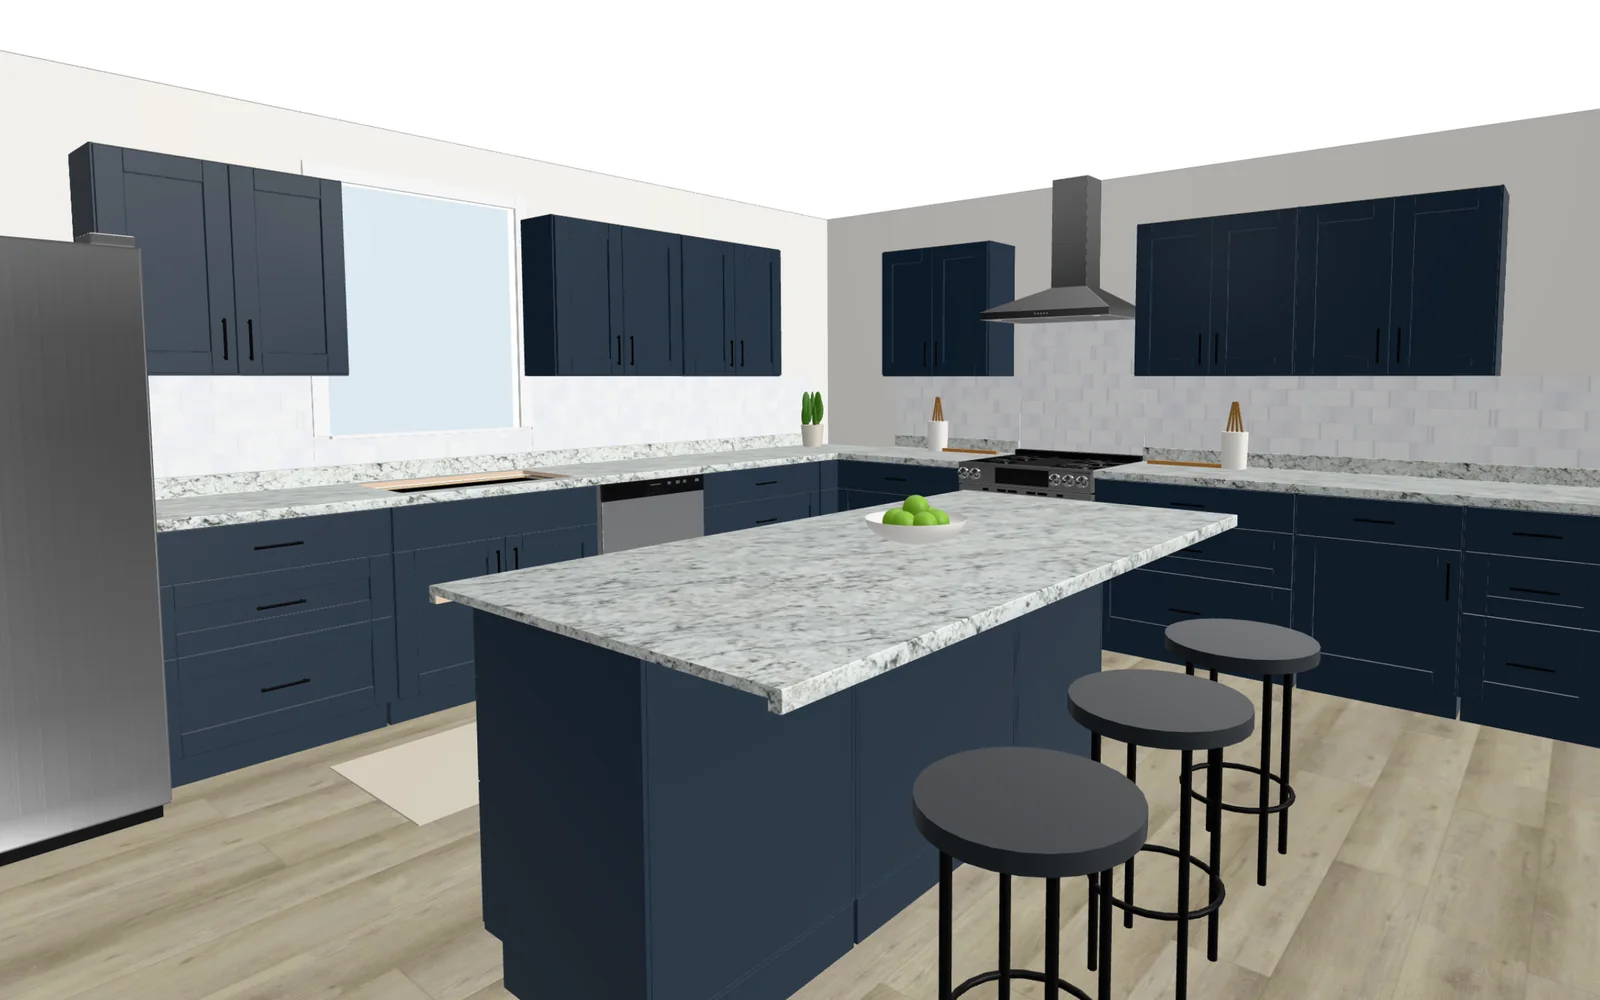
The plan becomes a room
The same plan in 3D with measured finish colors and real surfaces. Tap any product for its size and fit notes.
- Eye level · step 5 of 7
Stand in it before you sign
Walk corner to corner at eye height with the homeowner, with the real range, hood and cabinets in place.
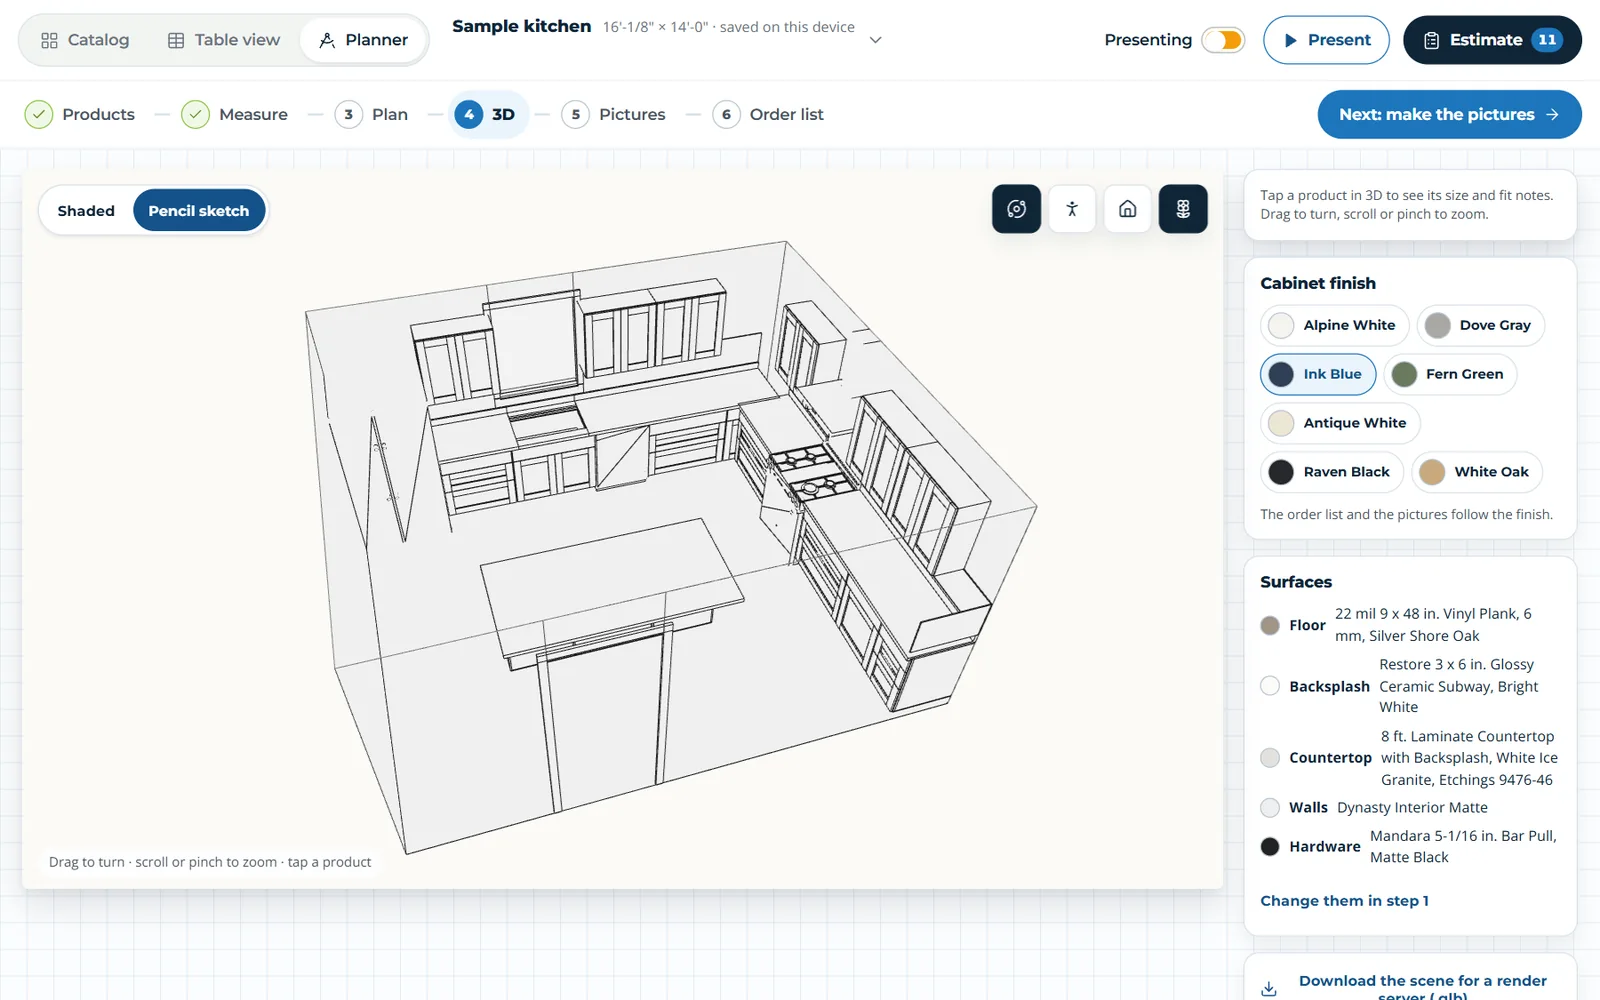
- Sketch · step 6 of 7
A pencil look for early talks
The same model drawn by hand, for the first design conversation.
- Photo · step 7 of 7
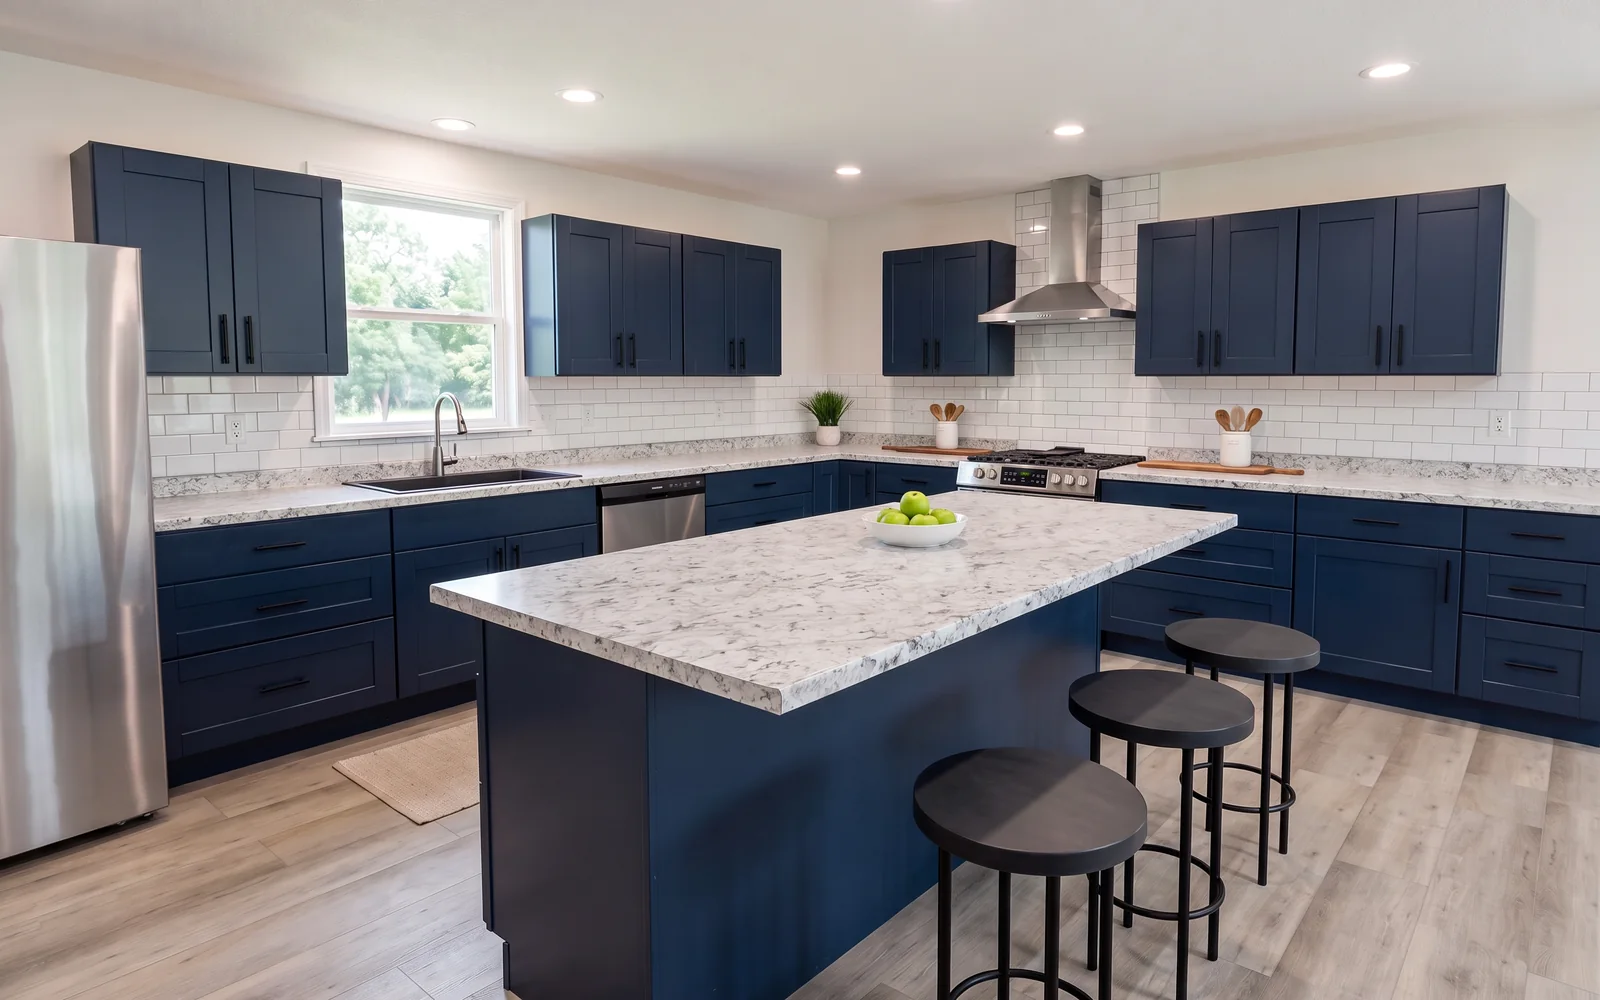
From 3D model to a lifelike photo
I gave the 3D view and the plan's spec list to Adobe Firefly (Nano Banana 2): Avondale Ink Blue cabinets with black bar pulls, White Ice granite-look tops, white 3 x 6 subway tile, Silver Shore Oak planks and stainless appliances. Back came the same room as a photo, every cabinet where the plan puts it, before anything is ordered.